Social media has become a huge part of our lives. What started with dialing into your 56K modem to launch online message boards and ICQ in our spare time has evolved into an intimate extension of our real world persona.
People use their various social media accounts to share with the world their range of interests and activities, creating an online presence that can attract hundreds, thousands, and even millions of followers who tune into your daily exploits.
While Facebook and Twitter have had their heyday, Instagram seems to be the platform at the forefront for people who either want to showcase their budding photography, myself included, or who want to upload daily selfies of themselves. And with features like uploading videos and the new Stories feature that borrows heavily from Snapchat, it is becoming a booming platform for all kinds of immersive content.
As the saying goes, the best camera is the one you have with you. So undoubtedly in 2016 that means the best camera you have is your smartphone camera. Let’s face it, your smartphone is your lifeline; wherever you go it goes too. With that in mind, smartphone cameras are vastly improving to replicate DSLR like capability to extend the quality and reach of your smartphone’s camera, which means better quality posts to Instagram!
So, how do you take better photos?
If you’re using an iPhone chances are you use the stock camera app that comes pre-installed on iOS. While the stock camera app offers decent point-and-shoot capability, it is sorely lacking in any form of manual control over key settings to frame your shot. That’s where third-party apps come in.
Before we dive into the best third party apps to install, however, let’s go over some basic photography terminology to help you get acquainted with the manual controls that third-party apps can offer you and why you’d want to use them in the first place.
ISO
ISO is basically a range in which your camera’s image sensor registers light sensitivity to available light. A lower ISO number means it is less sensitive to light. A higher ISO number increases the light that comes into the camera’s image sensor.
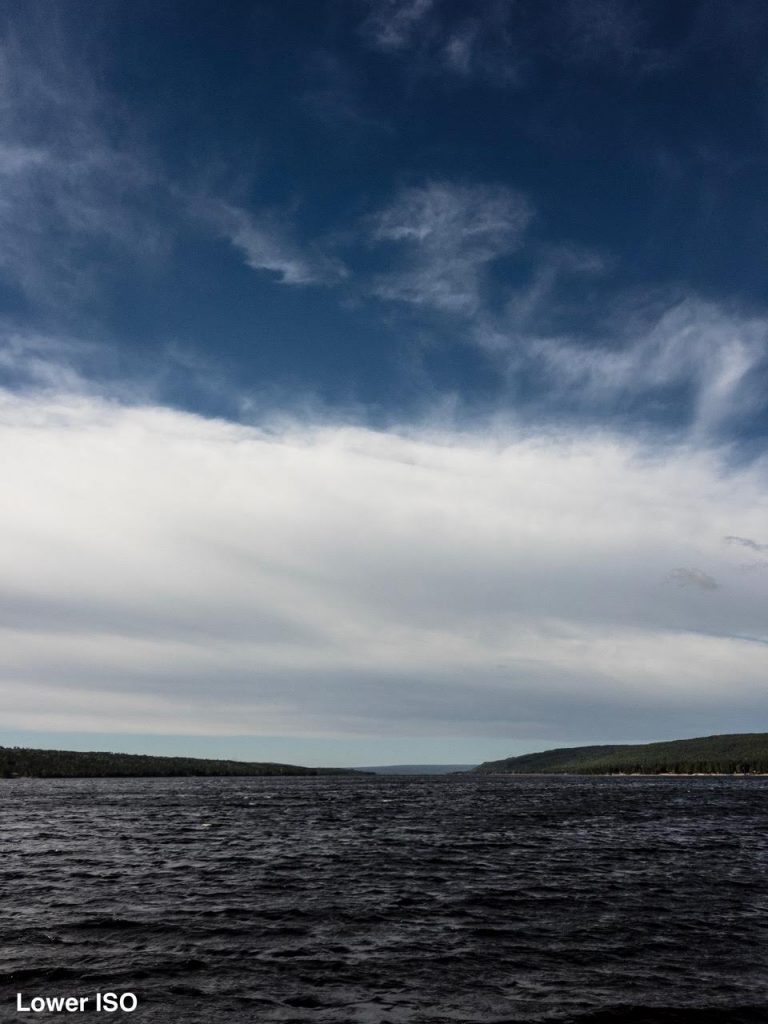
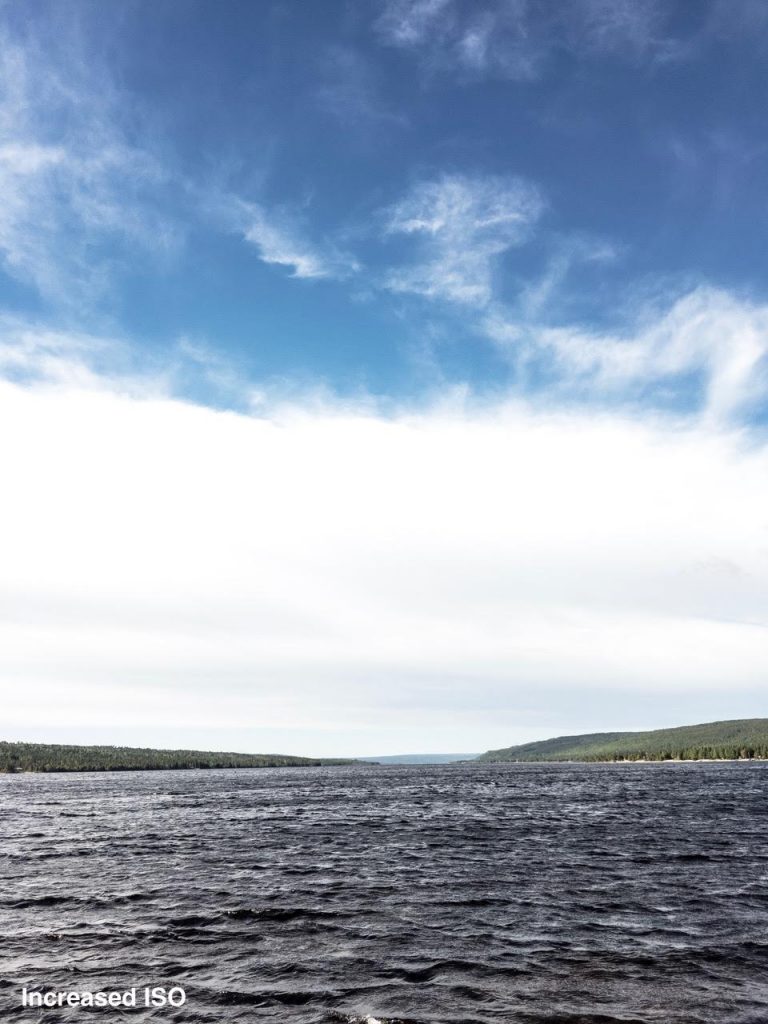
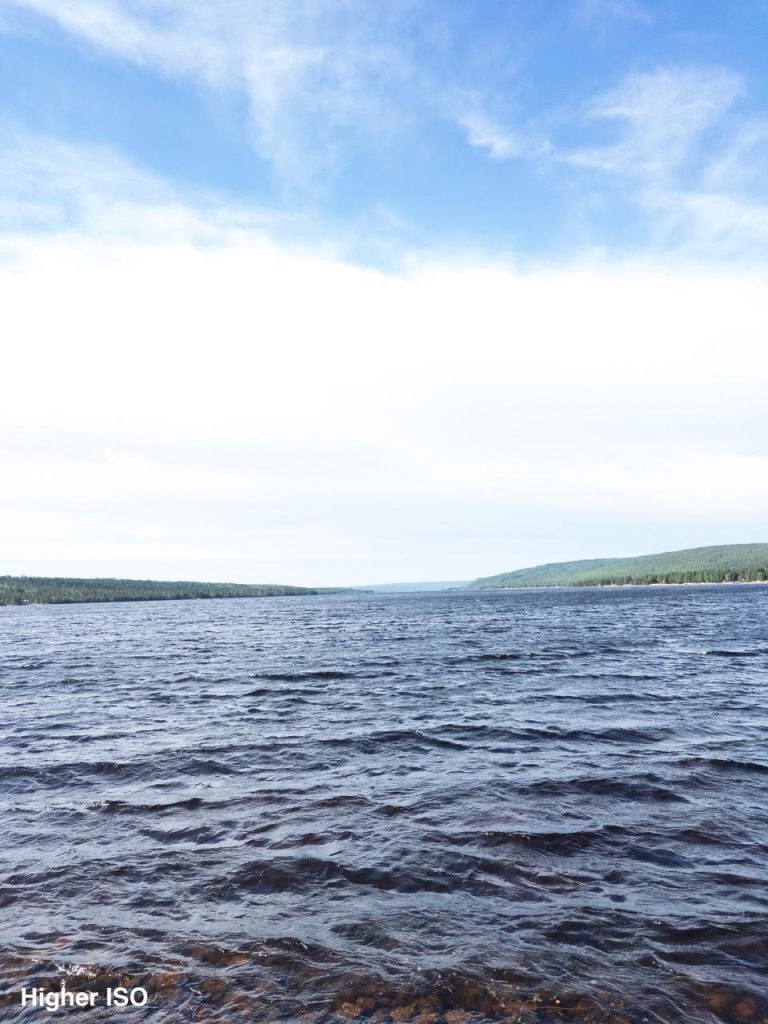
Ever want to take a shot at night but all you see is mostly black? Well turning up the ISO can help bring some light into the sensor so that you can see more of your surroundings in the shot. The downside of this, however, is that image quality lessens the higher you increase ISO in low light conditions. This leads to getting more grain in your shot. So you should sparingly move the ISO number to keep as much of the quality of the shot as you can.
In average to bright light, increasing the ISO can actually wash out some details around the light in your photos. So it’s best to keep ISO on the lower end of the spectrum as a rule. If you want to achieve a softer, washed out look to your photo, however, turning up the ISO can help you achieve that look.
It’s always best to frame your shot and see how changing the settings is affecting what you see. Keep making adjustments until you get the look you desire.
Aperture
While ISO controls your camera’s sensitivity to light, aperture controls how much light enters your camera shutter.
Your cameras aperture is a hole in the lens which light travels through to the camera sensor. The depth of field, or sharpness of your image, depends on how wide or narrow the aperture is. While your iPhone’s aperture is pre-set, there are still ways you can adjust photos to change focus and bring more depth of field.
For example, let’s say you want to take a picture of someone on the beach and you want the focus to be on the person with the background blurred enough to draw the eye to your subject. While the most basic user knows you can tap the screen to shift focus, the downside with the stock camera app is that it also sets exposure based on what you’ve focused. So if your subject is in better light than the background, you’ll unfortunately cause the background to lighten up to match your subject, unwittingly diminishing the depth of your image.
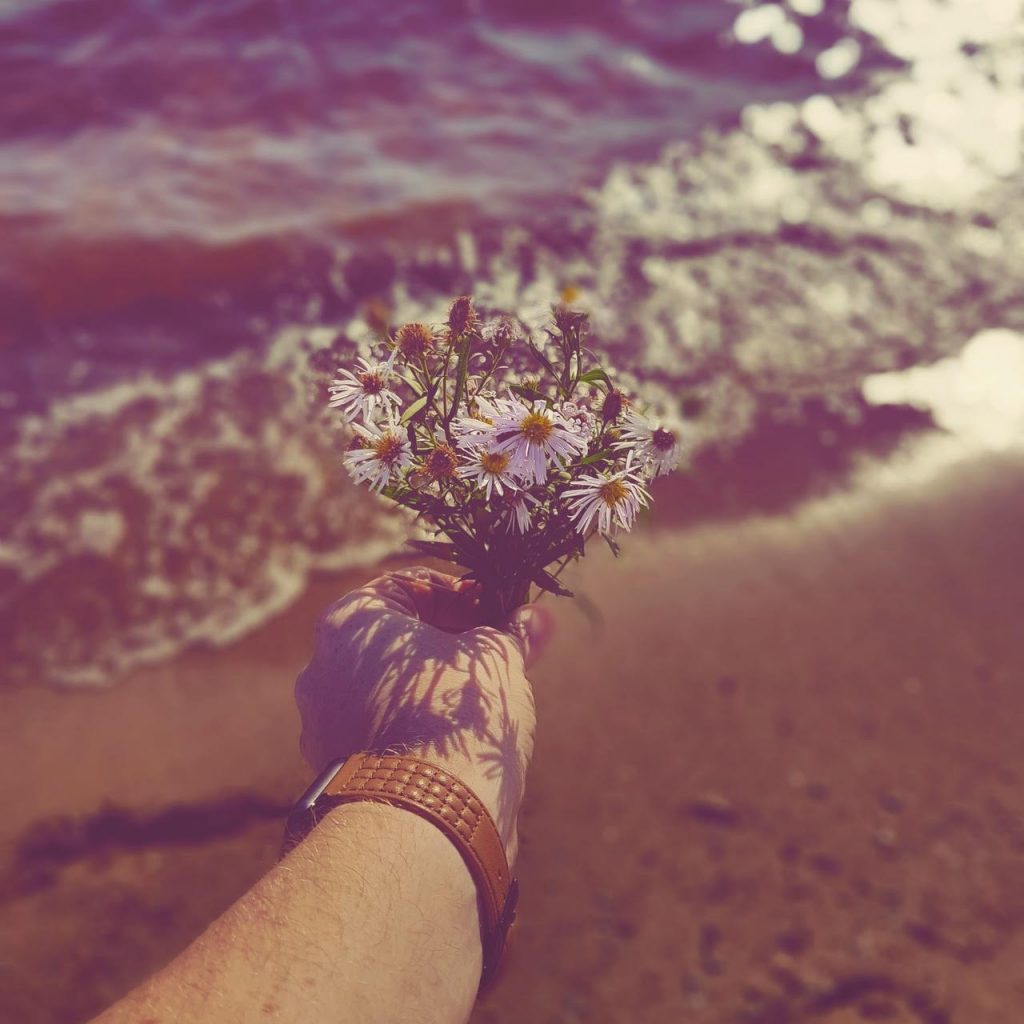
Instead, making use of manual controls allows you to set focus and then manually shift the exposure to suit your needs. In the picture below, for example, the flowers and my arm are in the foreground while the sand and water on the beach are softly blurred in the background to create a depth-of-field effect.
Shutter Speed
Now that you understand your cameras sensitivity to light and what controls the amount of light coming through, Shutter Speed essentially determines the length of time light enters your sensor.
Shutter speed offers many advantages to how you frame your shots and what kinds of shots you can frame. For example, if you want to capture someone in mid jump you can speed up the shutter to obtain a sharper image of the movement. This would effectively reduce the blurriness associated with moving objects.
If you’re prone to shaky camera movements a fast shutter speed can reduce the shakiness and create a stiller shot as well.
A slower shutter speed allows the light to hit your sensor for longer. If you’re going to use a slower shutter speed it’s best to use a tripod to mount your phone as you will want a super steady shot.
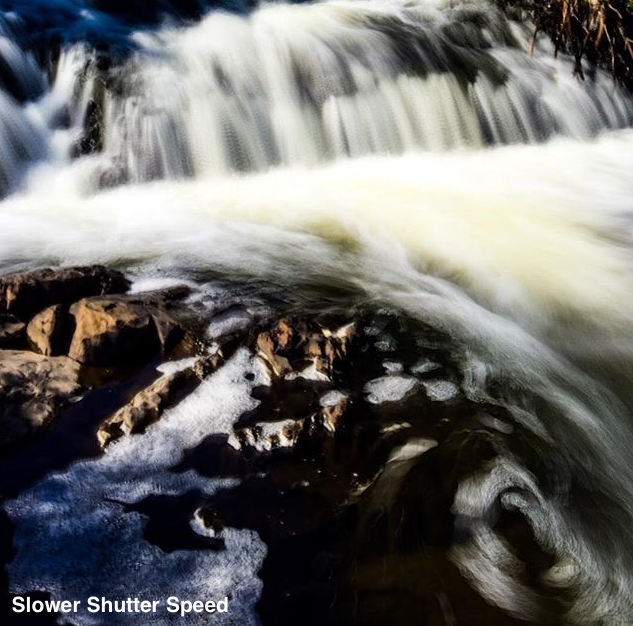
Slower shutter speeds enable you to do long exposure photography. Think about those photos you see of waterfalls that look almost like flowing mist with lots of soft swirls. That is essentially what long exposure photography is. Basically the light enters your sensor for longer, slowing down the movements in your photo and providing a smoother look to your photos.
This is displayed, albeit not professionally in the least, in the image below. I unfortunately didn’t have a tripod available to take a less shakier shot but it’ll give you the gist.
App Attack
So now that we have the basic information down on exposure, let’s assess the best apps that allow you to manipulate your exposure to create more dynamic shots.
Camera+ – Free/$3.99. I would recommend splurging the $3.99 here to get all the features you want and could need. Camera+ is one of the best reviewed and most used third party camera apps for the iPhone today. It offers a lot of added features that elevate your iPhone from a standard point-and-shoot to as close to a DSLR professional camera you can get given the built in optics of the iPhone camera.
Take some time to go through the settings and take some practice shots with it to utilize it to it’s full advantage. You can adjust focus and lock it in for your shot, as well as manually manipulate exposure and shutter speed. It even comes with a stabilizer and a macro feature so you can get close up details of objects. Highly recommend this app!
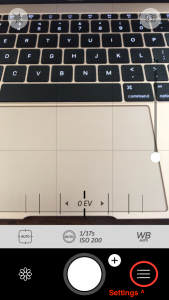
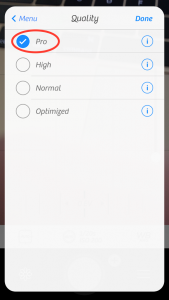
Most importantly, you’ll want to tweak the settings to save the highest quality image as possible. Click the settings icon in the bottom right, then scroll down until you see “Quality” and select “Pro”.
MuseCam – Free. MuseCam is also a great app and it’s FREE! You’ll essentially get most of the features that you get with Camera+ and it has an incredibly simple user interface. You can adjust shutter speed, ISO, and focus. It also comes with a load of presets – and more that you can add on or purchase – to give a little polish to your shots. You can even create your own presets and save them for future use, which is incredibly useful if you want to achieve a consistent look to your Instagram feed, for example.
Slow Shutter Cam – Free. Another great FREE app! This app allows you to adjust your exposure and focus as well, but has more features for shutter speeds. If you click the settings wheel on the bottom left of the app you get a screen that gives you 3 options: Motion Blur, Light Trail, and Low Light. Within each of these options you can adjust shutter speed as well as blur strength (in motion blur), light sensitivity (in light trail), and exposure boost (in low light).
VSCO – Free. VSCO is a very minimalist looking app. It offers the basics while taking your shot, but it’s strengths are in it’s presets.
Taking the guess work out of all the options you get in apps like Camera+ and MuseCam, VSCO offers some really great presets to modify your photos after you’ve taken them. It offers a wide array of options that can create blurred effects, muted tones, or even a brighter image.
You can also share your photos with the VSCO community and create your own portfolio in a clean design that makes your photos look like they’re posted in an art gallery.
Adobe Lightroom – Free. This is my favourite post snap editing app. Adobe has long been synonymous with professional features and tools for photography curation. Lightroom offers so many features that it’s hard to list them all.
Personally, I like to play around with exposure, contrast, and clarity the most. But there’s times I manipulate more of the available tools. You’ll soon see the full scope of the power behind Lightroom if you play around with all of it’s features. You can change the entire look of your shot and still be left with a high quality image.
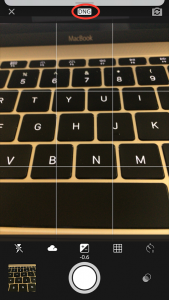
If you’re taking photos with Lightroom, make sure you see “DNG” at the top of your app. This means you’re saving your files in Adobe’s RAW format, which is a larger file that contains more image quality than the standard, compressed JPG format. If you see JPG, just tap it and change it to DNG.
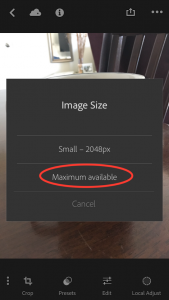 Saving your photos in Lightroom, after editing, needs to be done as your photos will not automatically save to your camera roll. After you’ve completed editing, hit the box with the arrow pointing up to bring up the menu and select “Save to Camera Roll”. Then select “Maximum Available” to keep the highest quality image you can store.
And lastly, Instagram – Free. Continuing with apps that offer the best post-production options for your photos, Instagram has quite an array of editing tools hidden within it’s user interface that can be easily overlooked.
Don’t go for one of the presets that someone can easily point out that you’ve used, instead opt for manually customizing your photos. Most of the features found in Adobe Lightroom are present, albeit with less dynamic range. But if you are mostly into a one-stop shop for editing and sharing, then it’s likely you’ll make do just fine.
 When you’re
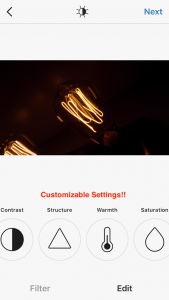 on the filter page, simply look at the bottom of the app and click the edit button instead. There you’ll find all the available features that you can use. And at the very top in what looks like a sun icon, you can manipulate how rigid the details are in your photos. The higher you move up, the more harder surfaces you see. The lower, the smoother it becomes.
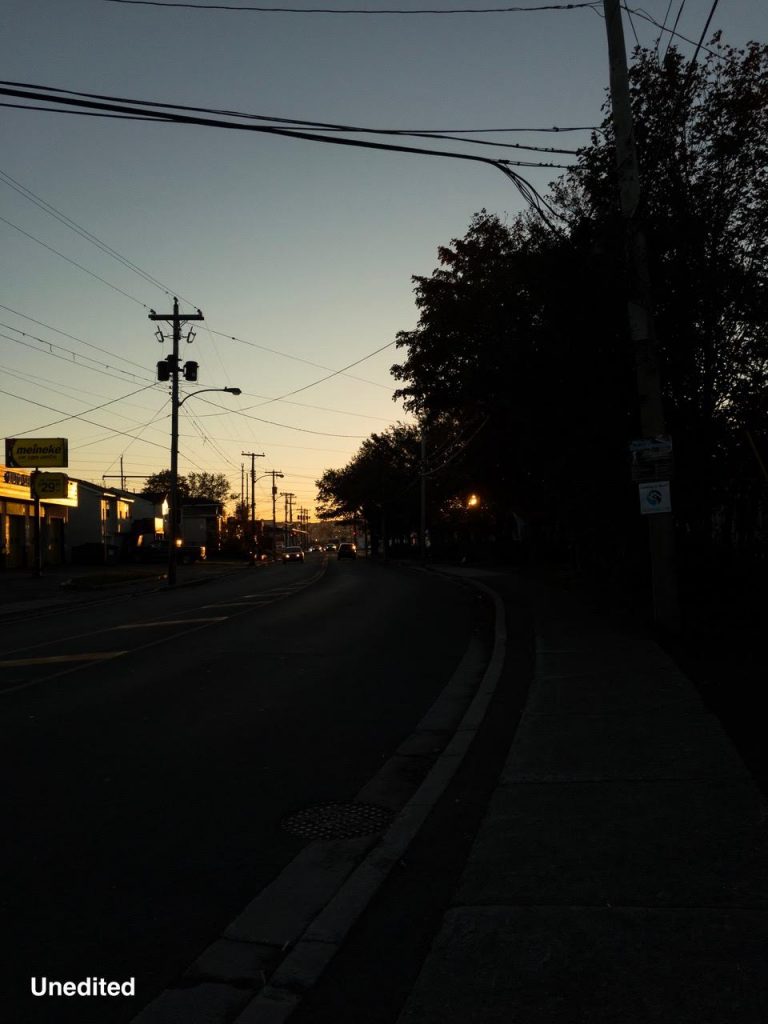
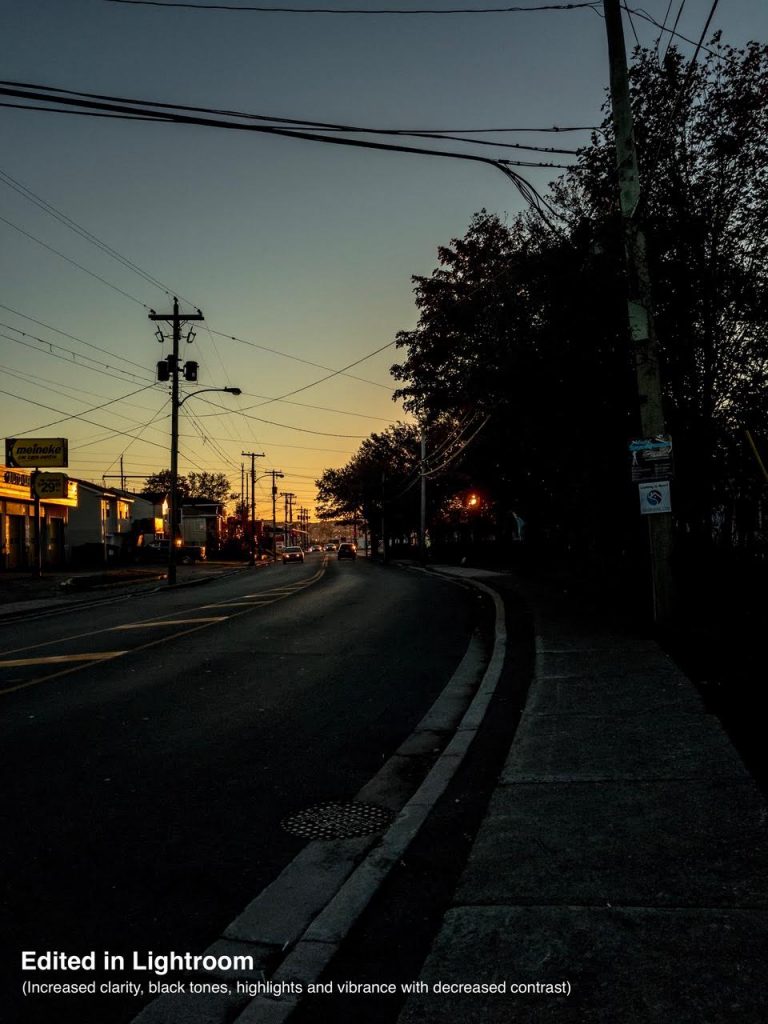
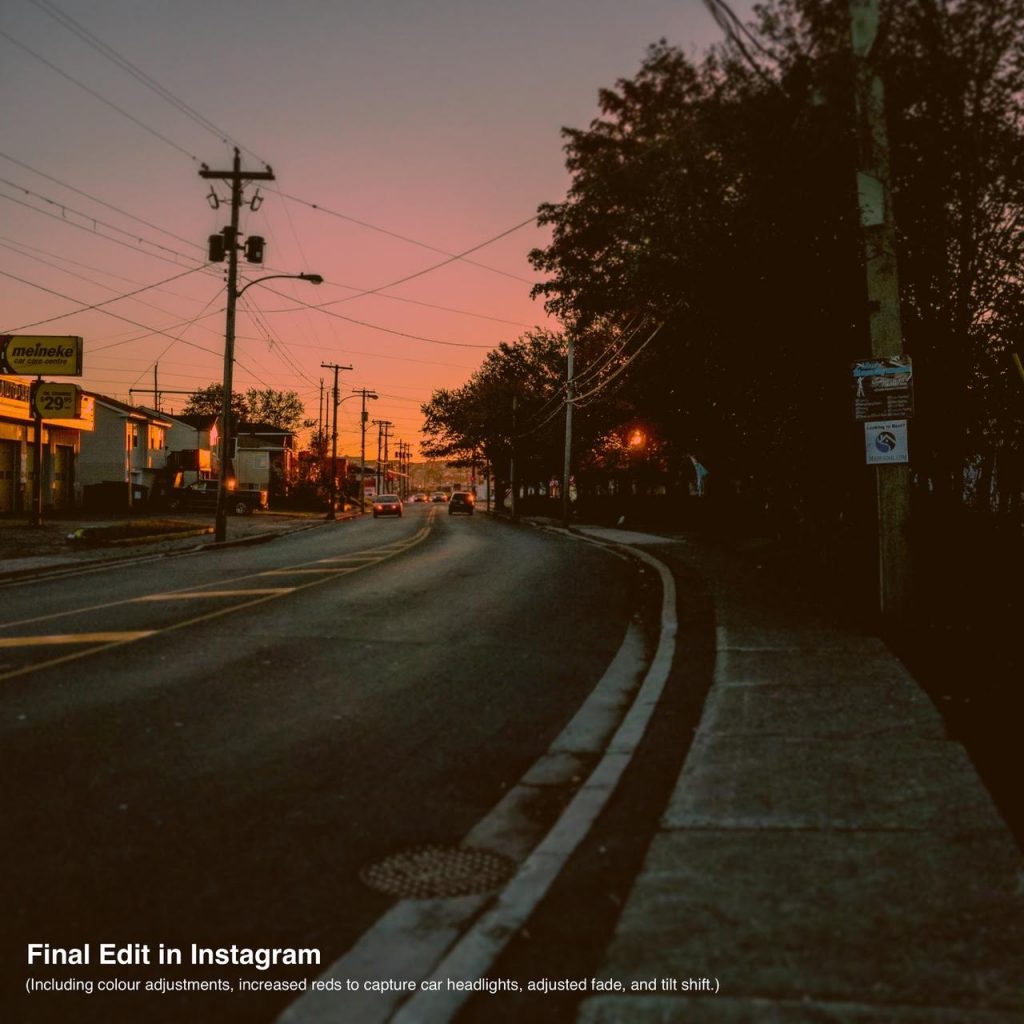
If you want to take your photography game to the next level without having to break the bank and buy a bulky DSLR or SLR camera, then utilizing any of the above apps can greatly impact the look and feel of your photos! Here is an example of an image I took with my iPhone just the other day to illustrate just how different an image can look based on your manual control.
Try them out and let us know what you think. Better yet, feel free to share some of your best captures below or share any apps that you use that we might want to try!
And I can’t end this article without a little personal advertising plug – so feel free to check out my personal Instagram (@sjvivs) if you enjoy various Newfoundland scenery, both urban and rural, and where the pictures in this article (and many more!) are featured!
Happy Snapping!


Leave A Reply